The Inspect Point tagging system is an optional tool that our customers love taking advantage of. It’s also completely accessible to everyone who uses Inspect Point.
The tagging system simplifies your processes because it combines the workings of common search tactics used by most people everyday (think: search engines or social media sites): searching key words.
Tags are used to easily locate and bring up either a building or an inspection within the Inspect Point platform–think a hashtag! This cuts down the time it takes to shift through the large amount of contracts you have on file.
Create a Tag
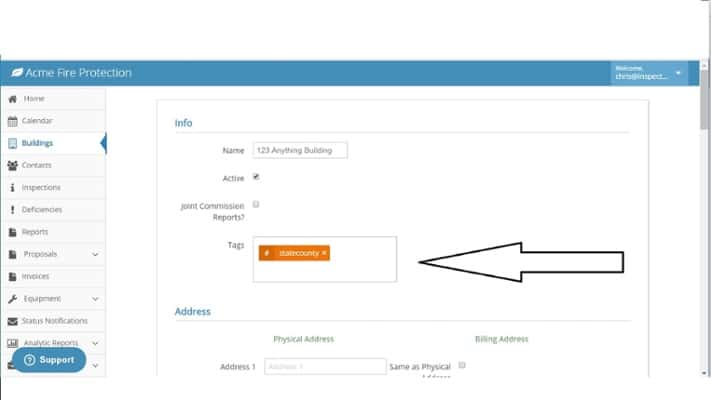
Creating the tag can be done either when you create the inspection or building. Simply type in whatever you want the tag to be in the ‘Tags’ box seen in the picture below. Moving forward, if you wanted to add a tag to an already existing building/inspection, you would just edit the instance and add a tag the same way you did when creating one originally.

Filter by Tag
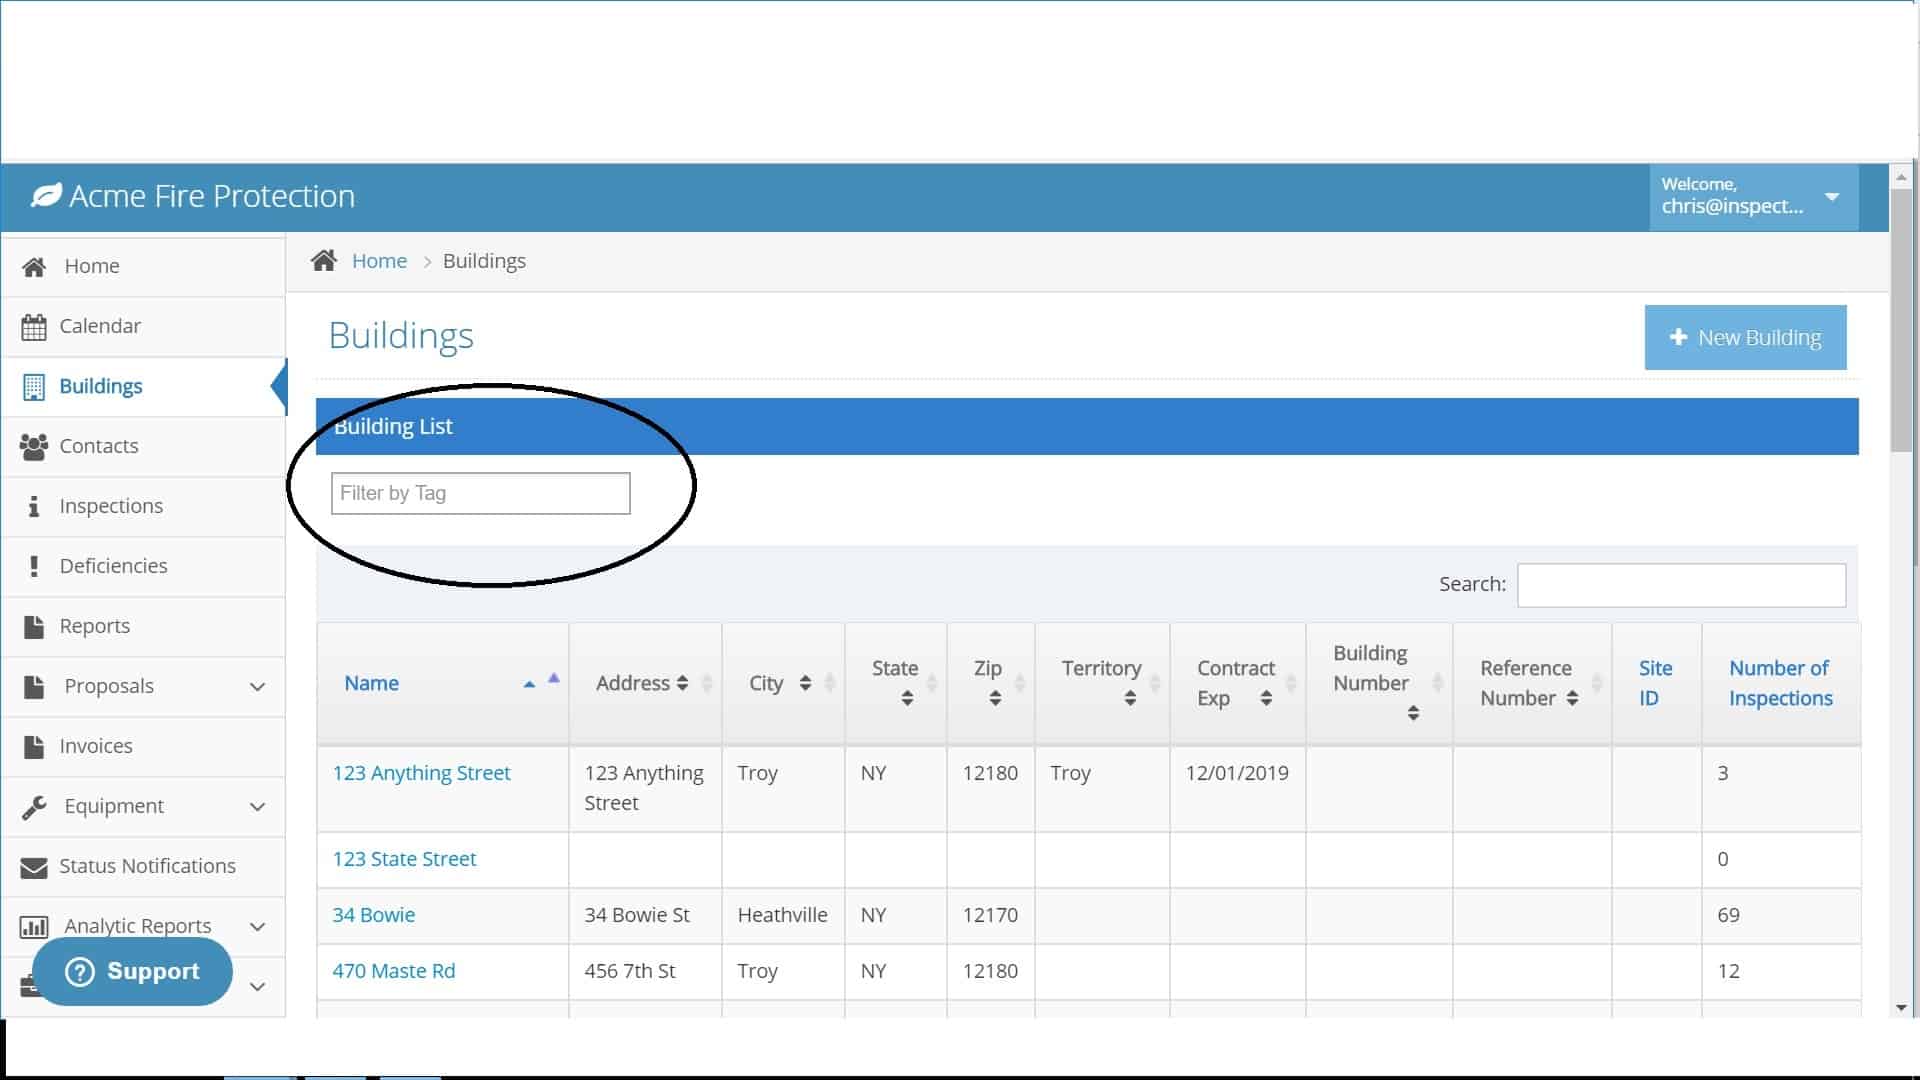
In this case, to find the tag just set, navigate to the ‘Buildings’ tab where you will find a search bar. Here, you can ‘Filter by tag.’ Alternatively, if you had set a tag on an inspection, you would repeat the process, this time going into the Inspections tab and finding the same search bar located at the top.

To get the most out of this, companies will use a wide range of strategies depending on their needs. We often see strategies like tagging buildings by location or zone, or tagging inspections by the technician who completes it. After all, the beauty of the tagging system is that it’s a free-form field. With that, companies have the ability to make it work for them however they’d like!
If you are one of our valued customers and haven’t tried messing around with tags yet, get with some of your colleagues and try it out! If you’re curious to see how it all works, a member of our team is ready to guide you through a live demo of this feature or any other Inspect Point feature you’re interested in.
Ready to learn more about Inspect Point?
Book a Demo

